Solution to the Pyraminx
Notation
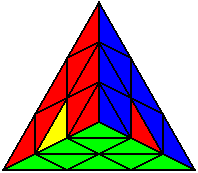
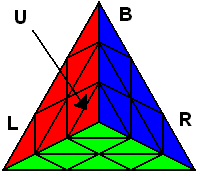 If you know the notation for the Rubik's Cube, the Pyraminx notation will be no problem. Each of the four corners is labeled as shown on the right. One-layer turns only affect the trivial tips, the little pyramidal pieces on the corners, so we won't use them for algorithms, but a one-layer turn of the R corner, for example, would be labeled as r (if it is a clockwise turn) or r' (if it was counterclockwise). Similarly, a two-layer turn of the R corner would be labeled as R or R', and all of the other corners follow the same notation. There are two important types of pieces on a Pyraminx: the four corners (the pieces touching the trivial tips) and the six edges (the other pieces).
Part 1: Four Corners and Two Edges
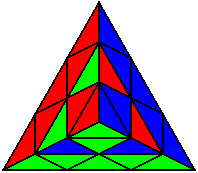
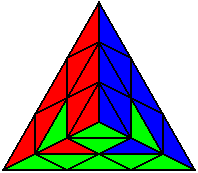
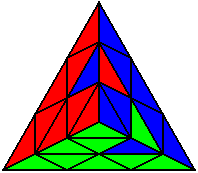
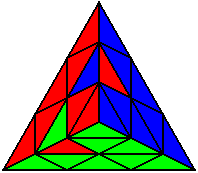
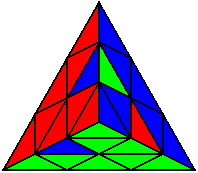
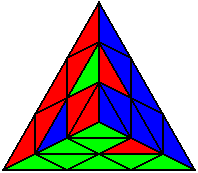
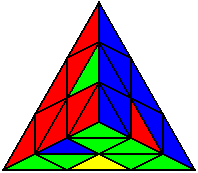
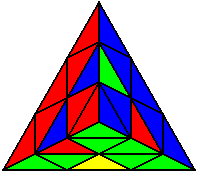
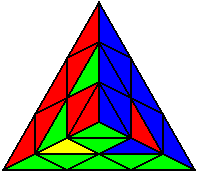
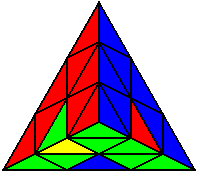
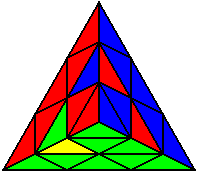
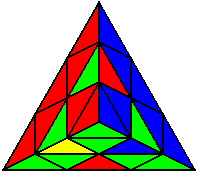
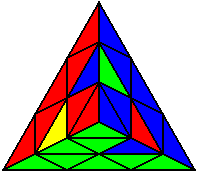
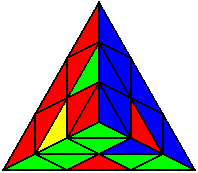
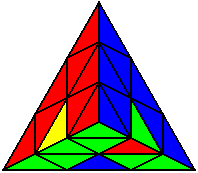
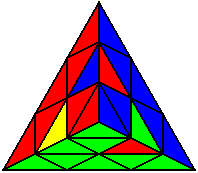
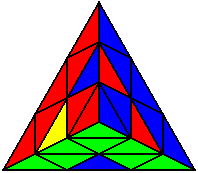
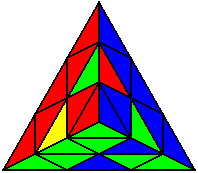
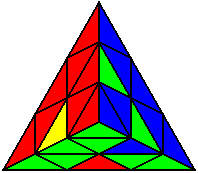
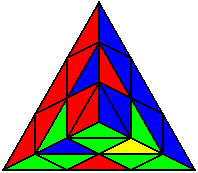
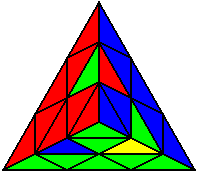
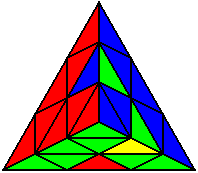
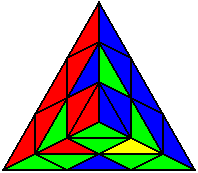
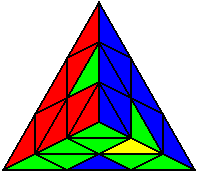
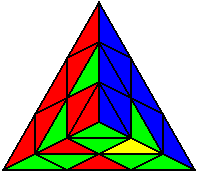
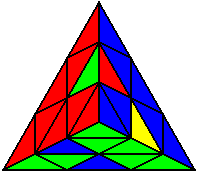
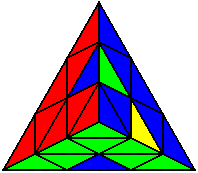
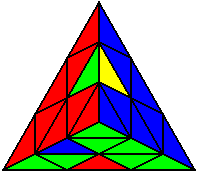
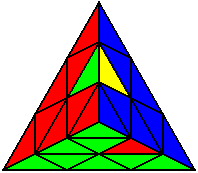
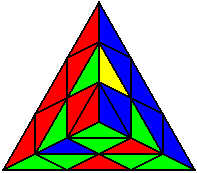
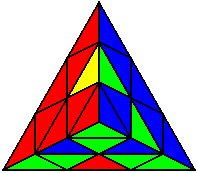
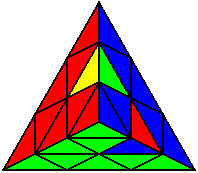
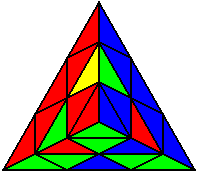
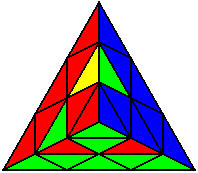
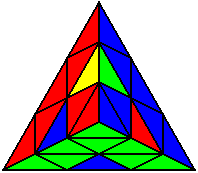
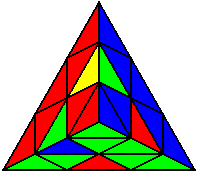
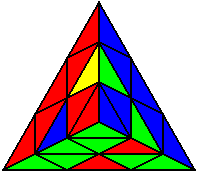
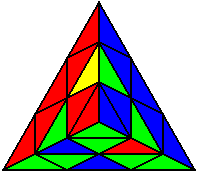
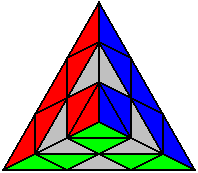 The image on the left shows what we want to accomplish: we want to correctly orient all of the corners, solve all of the trivial tips, and also solve two edges. This seems like a difficult task, but it can actually be done very quickly.
I would start by orienting three corners. To do this, choose any color and find the three corners that have stickers of that color. Then, orient the corners so that those stickers are all on the same face. You will want to hold that face on the bottom for the rest of the solve. Now, to add the two edges, you will want to use moves of the form R U R', R U' R', R' U R, and R' U' R. Each one of these moves, along with U turns, will bring one edge to the bottom layer, and if you did the algorithm correctly that edge will be solved. Finally, orient the U corner with a turn, and fix all of the trivial tips.
Once you get more experienced at the Pyraminx, you will be able to solve the bottom three corners and one edge (or even two edges) as one step, and you will be able to see how to do this during the 15 seconds that you have for inspection. For example, if one edge is already paired up with one corner, it is always possible to solve a face so that that edge is in the correct position in that face.
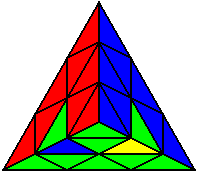
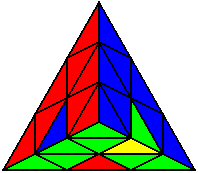
Part 2: The Last Four Edges
The only things left to solve on the Pyraminx are four edges. Turn the entire puzzle as if you were doing some turn of U so that the unsolved edge on the bottom layer is in the front. Now there are 96 possible cases, of which only one is already solved. You will have to memorize all of these algorithms if you want to be able to do Part 2 in one step. Note that if more than one algorithm is listed you can freely choose any of them to learn and use.
These cases are organised into groups, based on the location of the last edge on the bottom layer, which is in these diagrams the yellow-green edge. The color scheme used here is just an example, and if you want to use these algorithms to their fullest extent you will have to be color-neutral.
Group 1 |
(solved!) |
R U' R' U' R U' R'
R' U' R U' R' U' R |
R U R' U R U R'
R' U R U R' U R |
U L U' R U' R' U L'
L U' R U R' U L' U'
R' L R L' U L' U' L
L R' L' R U' R U R' |
R' U L' U L U' R U' |
L U' R U' R' U L' U |
L U R U' R' L'
L' B' U' B U L |
R' L' U' L U R
R U B U' B' R' |
B' R' U' R U B
B U L U' L' B' |
L R U R' U' L'
L' U' B' U B L |
R' U' L' U L R
R B U B' U' R' |
B' U' R' U R B
B L U L' U' B' |
Group 2 |
R L' U L U' L R' L'
R U' R' U L' U L U' |

U' R U' R' U L' U L
U L' U L U' R U' R' |

L' R U' R' U R' L R
L' U L U' R U' R' U |
U L' U L R U' B U' B' R'
R B U B' U R' L' U' L U' |
U' L' B' U B' L' B' L'
U' R' B' R' B' U B' R' |
U L B L B U' B L
U R B U' B R B R |
R U' R' L' U' L U' |
U' R U' R' L' U' L |
U R U' R' L' U' L U |
U' L' U L R U R' U' |
U L' U L R U R' |
L' U L R U R' U |
Group 3 |
U' L' B' U B L |
L R' B L B' L R |

U R' L R L U' L |
U L R L U' L' R' L' |

U L' U' L |
R U R' U L' U L |
L R' L' R |
U L' B' U' B U' L U |
U' L' U L |
L' B L' B' L' |
U R U' R' U L' U' L |
U L' U B' U B L |
Group 4 |
L' U L R U' R' |
U' R U B' R B R |
U' R U R' U R U' R' |
L R L U L' R' L' U' |
R U' R' U |
U L' U L U' R U R' U |
U L B L B' L U' |
U R U' B U' B' R' U |
U R U R' U |
U' R' L R L' U |
R' B' R' B' U' B' R' U |
U R B U B' U R' |
Group 5 |
U' R U R' |
R' L R L' |
L' U' L U' R U' R' |
U' R B U B' U R' U' |
U R B U' B' R' |
U' L R' L' R' U R' |

R' L B' R' B R' L' |
U' R' L' R' U R L R |
U R U' R' |
U' L' U L U' R U R' |
R B' R B R |
U' R U' B U' B' R' |
Group 6 |
L' U L U' |
U' R' B' R' B R' U |

U' R U' R' U L' U' L U' |
U' L' U B' U B L U' |
R U' R' L' U L |
U L' U' L U' L' U L |
U L' U' B L' B' L' |
R' L' R' U' R L R U |
U' L' U' L U' |
L B L B U B L U' |

U L R' L' R U' |
U' L' B' U' B U' L |
Group 7 |
U' R U' R' U' |
L B L B' L |
L R B' R L B L R |

R U' B U' B' R' U' |
R U R' U' |
U L' B' U' B' L' B' L' |
U R' L R L' U' |

R B U B' U R' U |
U R U' R L R L' |
U' L R L U L' R' L' |
U' L' B' U' B L U' |
U R U' R' U' R U R' |
Group 8 |
L' U' L U |
U' L R' L' R U |
U' R B U B R B R |
L' B' U' B U' L U' |
U L' U L U |
R' L' B L' R' B' R' L' |

R' B' R' B R' |
L' U B' U B L U |
U' L' U L' R' L' R |
U R B U B' R' U |
U R' L' R' U' R L R |
U' L' U L U L' U' L |
Mathematics and Details
Other than the algorithms for Part 1, there are 95 algorithms to learn in Part 2. If you decide to solve the edge of the bottom layer and then solve the last three edges in one step, you will solve the puzzle less efficiently, but you only need to know 11 algorithms, many of which are similar.
In its most basic form, counting double-layer turns or twists of a single trivial tip as one move, Part 1 requires an average of 41/3 ≈ 13.67 moves. Using all of the algorithms, Part 2 requires an average of 161/24 ≈ 6.71 moves, and so the total is 163/8 ≈ 20.38 moves. If you use a little lookahead on Part 2 and take advantage of U or U' turns when they appear at the beginning of algorithms, you can skip 1 move in Part 2 9/16 of the time, making the total movecount only 315/16 ≈ 19.69 moves. Of course, this can be even further reduced if you plan ahead and use more efficient techniques on Part 1.